
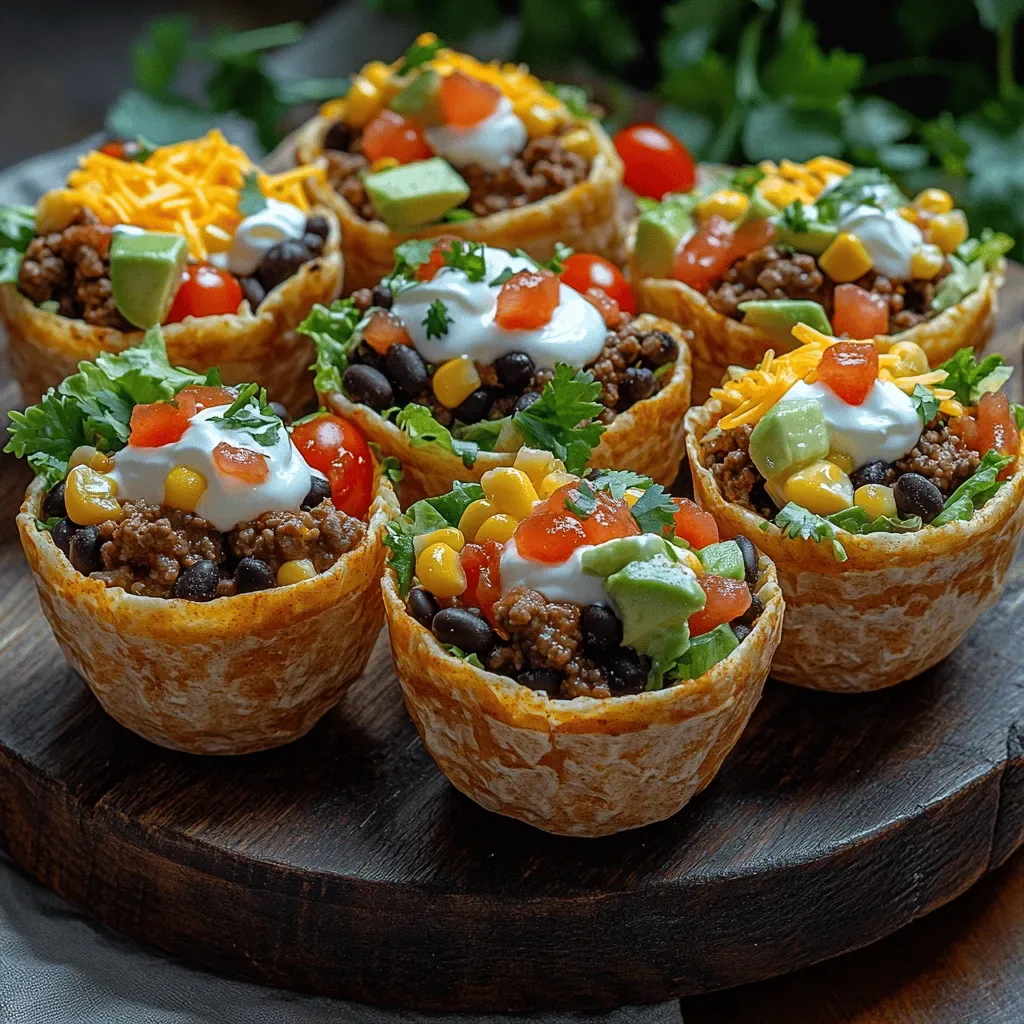
Imagine biting into a perfectly crisp tortilla cup that bursts with seasoned taco meat, fresh veggies, and a creamy drizzle—all in one bite-sized masterpiece. That’s the magic of Crunchy Mini Taco Salad Cups, an appetizer that feels playful yet utterly satisfying.
What makes this dish stand out is the contrast between the crunchy shell and the juicy, flavorful filling, enhanced by a bright lime‑cilantro crema that ties everything together.
Anyone who loves bold Mexican flavors—whether you’re hosting a brunch brunch‑style gathering, a weekend brunch with friends, or a family breakfast‑lunch combo—will adore these bite‑size wonders.
The process is straightforward: bake or fry ready‑made mini tortilla shells, toss a quick taco‑seasoned protein with beans and corn, pile on fresh toppings, and finish with a drizzle of lime crema. In under 40 minutes you have a crowd‑pleasing appetizer that looks as good as it tastes.
Why You'll Love This Recipe
Hand‑Held Fun: Each cup is a portable bite that lets guests eat without utensils, turning snacking into an interactive experience perfect for brunch tables.
Flavor Layers: Seasoned meat, creamy avocado, tangy lime, and crunchy lettuce create a harmonious blend that keeps the palate excited from the first bite to the last.
Quick Assembly: The recipe uses pre‑made mini tortillas and a simple stovetop filling, so you can have a polished appetizer on the table in under half an hour.
Customizable Canvas: Swap proteins, add extra veggies, or adjust the heat level—these cups adapt to any dietary preference or flavor craving.
Ingredients
The foundation of these mini cups is a mix of crunchy tortilla shells and a savory taco filling. Ground beef (or turkey) provides heartiness, while black beans and corn add texture and a subtle sweetness. Fresh vegetables—like cherry tomatoes, red onion, and crisp lettuce—bring brightness, and creamy avocado and a lime‑cilantro crema finish the dish with richness and acidity. Each component is chosen to balance crunch, moisture, and flavor.
Main Ingredients
- 12 mini corn tortilla cups (store‑bought or homemade)
- 1 lb ground beef (or turkey)
Taco Filling
- 1 tablespoon olive oil
- 2 teaspoons taco seasoning (store‑bought or homemade)
- ½ cup canned black beans, drained and rinsed
- ½ cup frozen corn, thawed
Fresh Toppings
- ½ cup cherry tomatoes, quartered
- ¼ cup red onion, finely diced
- 1 cup shredded lettuce
- ¼ cup shredded cheddar cheese
- 1 ripe avocado, diced
Lime‑Cilantro Crema
- ½ cup sour cream
- 1 tablespoon fresh lime juice
- 2 teaspoons chopped fresh cilantro
- Pinch salt
Together, these ingredients create a balanced bite: the tortilla cup offers a sturdy, crunchy vessel; the seasoned meat, beans, and corn supply savory depth; the fresh vegetables add crisp, juicy contrast; and the lime‑cilantro crema ties everything together with a tangy, creamy finish. The result is a vibrant, handheld taco salad that’s perfect for brunch or any casual gathering.
Step-by-Step Instructions
Preparing the Base
Preheat your oven to 375°F (190°C). If you’re using store‑bought mini tortilla cups, arrange them on a baking sheet and bake for 5‑7 minutes until they turn golden and crisp. This brief bake locks in structure, ensuring the cups stay sturdy when loaded with wet fillings.
Cooking the Taco Filling
- Heat the Skillet. Warm 1 tablespoon olive oil in a large skillet over medium‑high heat. When the oil shimmers, it’s ready to sear, which will develop a caramelized crust on the meat.
- Brown the Meat. Add 1 lb ground beef (or turkey), breaking it up with a spatula. Cook for 4‑5 minutes, stirring occasionally, until the meat loses its pink color and begins to brown.
- Season. Sprinkle 2 teaspoons taco seasoning over the meat, stirring to coat evenly. Cook another 2 minutes so the spices release their aroma and meld with the juices.
- Add Beans & Corn. Stir in ½ cup black beans and ½ cup corn. Cook for 2‑3 minutes, allowing the vegetables to warm through while retaining a slight bite.
- Finish & Rest. Remove the skillet from heat. Taste and adjust salt if needed. Let the mixture rest for a minute; this helps the flavors settle before spooning into the cups.
Assembling the Cups
Spoon a generous portion of the taco filling into each baked tortilla cup. Top with a handful of shredded lettuce, a few cherry tomato quarters, and a sprinkle of shredded cheddar. Add a few dice of avocado for buttery richness.
Drizzling the Crema
In a small bowl, whisk together ½ cup sour cream, 1 tablespoon lime juice, 2 teaspoons cilantro, and a pinch of salt. Drizzle the crema over each assembled cup, letting it pool slightly in the center for a burst of tangy flavor.
Final Touch
Serve the mini taco salad cups immediately while the shells are still crisp. The contrast of hot filling, cool crema, and crunchy cup makes every bite exciting and satisfying.
Tips & Tricks
Perfecting the Recipe
Toast the Cups Evenly: Rotate the baking sheet halfway through the 5‑minute bake to ensure all sides of the mini tortillas brown uniformly.
Season the Meat Early: Adding taco seasoning as the meat begins to brown allows the spices to caramelize, deepening their flavor.
Dry Ingredients First: Pat beans and corn dry with a paper towel before adding to the skillet; excess moisture can make the filling soggy.
Use Fresh Lime Juice: Freshly squeezed lime adds brightness that bottled juice can’t match, keeping the crema lively.
Flavor Enhancements
Add a pinch of smoked paprika to the meat for a subtle smokiness, or stir in a tablespoon of diced jalapeño for extra heat. A splash of hot sauce into the crema gives a gentle kick without overwhelming the dish.
Common Mistakes to Avoid
Don’t overfill the tortilla cups; too much moisture will make them soggy. Also, avoid using overly wet lettuce—dry it thoroughly with a salad spinner to keep the cup’s crunch intact.
Pro Tips
Make Mini Cups Ahead: Bake the tortilla cups up to 2 hours in advance and store them in an airtight container; re‑crisp them briefly under a broiler before serving.
Prep the Crema Early: Whisk the lime‑cilantro crema at least 30 minutes before assembly; this lets the flavors meld for a richer taste.
Serve on a Warm Plate: Warm plates keep the cups crisp longer, especially important for brunch when dishes sit out for a while.
Garnish Strategically: Add a final sprinkle of cilantro and a thin lime wedge on the side for a pop of color and extra zing.
Variations
Ingredient Swaps
Swap the ground beef for shredded chicken, chorizo, or firm tofu for a vegetarian twist. Use sweet potato cubes instead of corn for an autumnal flavor, or replace black beans with pinto beans for a different texture.
Dietary Adjustments
Choose gluten‑free corn tortillas to keep the cups safe for gluten‑intolerant guests. For a dairy‑free version, omit cheddar and substitute with a sprinkle of nutritional yeast. Use a plant‑based sour cream alternative to make the crema vegan.
Serving Suggestions
Pair the cups with a light citrus fruit salad or a side of black bean salsa for extra protein. A pitcher of sparkling agua fresca complements the bright flavors, while a simple avocado‑lime dip offers an additional creamy element.
Storage Info
Leftover Storage
Allow any leftovers to cool to room temperature, then separate the components if possible. Store the taco filling in an airtight container in the refrigerator for up to 3 days. Keep the tortilla cups in a separate container to preserve crunch. If you must store assembled cups, place a paper towel on top to absorb excess moisture.
Reheating Instructions
Reheat the meat filling in a skillet over medium heat, adding a splash of broth if it looks dry. To revive the cups, pop them in a 350°F oven for 4‑5 minutes until crisp again. Serve with a fresh drizzle of crema to restore moisture.
Frequently Asked Questions
Crunchy Mini Taco Salad Cups bring bold Mexican flavors to the brunch table with minimal effort and maximum impact. By following the step‑by‑step guide, mastering the quick taco filling, and using the tips for perfect crunch, you’ll create a crowd‑pleasing appetizer every time. Feel free to experiment with proteins, veggies, or heat levels—making the recipe truly yours. Serve, enjoy, and watch your guests reach for another bite!


