Why You'll Love This Recipe
The first time I tasted a pumpkin‑spiced pancake, I was sitting at a bustling farmers’ market in Vermont, the air thick with the scent of cinnamon and fresh‑baked goods. A vendor was serving mini pancakes topped with a swirl of pumpkin puree, and the experience felt like autumn had been captured in a single bite. I remember the warm, earthy flavor of pumpkin mingling with the light, airy texture of the pancake, and the subtle crunch of toasted pumpkin seeds that added an unexpected surprise. That moment sparked an idea: what if I could shrink that sensation even further, turning it into a portable snack that could travel from the kitchen to the office, or from a brunch table to a picnic blanket?
Back home, I began experimenting in my modest kitchen, testing different ratios of pumpkin puree to flour, adjusting the spice blend until it sang with the perfect balance of nutmeg, cinnamon, ginger, and a whisper of clove. I tried both classic buttermilk and oat‑milk batters, discovering that a splash of vanilla extract amplified the natural sweetness of the pumpkin without overwhelming it. After several rounds of trial and error, the recipe finally settled into a harmonious rhythm: a batter that was thick enough to hold its shape in a mini‑muffin tin yet light enough to puff up into a cloud‑like bite. The final touch was a drizzle of maple‑brown sugar glaze that added a glossy finish and a hint of caramelized depth.
What makes these Pumpkin Pie Pancake Bites truly special is the way they bridge the gap between comfort food and elegant brunch fare. They capture the nostalgia of a family‑sized pumpkin pie while offering the convenience of a handheld snack. Whether you’re serving them at a holiday gathering, a casual weekend brunch, or simply enjoying them with a steaming mug of coffee on a crisp fall morning, they promise a moment of indulgence that feels both familiar and fresh. The recipe is also remarkably adaptable—swap the pumpkin for sweet potato, add a pinch of chili for a kick, or top each bite with a dollop of spiced yogurt for a tangy contrast. No matter how you choose to personalize them, these bites will always deliver that warm, comforting essence that first drew me to them.
Ingredients

Choosing the right ingredients is the foundation of any great dish, and for Pumpkin Pie Pancake Bites the emphasis is on freshness, balance, and texture. Use a high‑quality canned pumpkin puree (or freshly roasted and pureed pumpkin) that is smooth and free of added sugars; this ensures the natural earthiness shines through. Whole‑wheat flour adds a subtle nutty note while keeping the bites tender, but you can substitute with all‑purpose flour for a lighter crumb. The spice blend—cinnamon, ginger, nutmeg, and a pinch of clove—should be freshly ground for maximum aroma; pre‑ground spices lose potency over time. For the leavening agents, a combination of baking powder and a splash of club soda creates a light, airy structure without making the batter too runny. Finally, the glaze is a simple mixture of pure maple syrup, brown sugar, and a dash of vanilla, which caramelizes just enough to give a glossy finish without overwhelming the pumpkin flavor.
Instructions

Prepare the Dry Mix
In a large mixing bowl, whisk together the whole‑wheat flour, coconut sugar, baking powder, salt, and all of the warm spices—cinnamon, ginger, nutmeg, and clove. Whisking ensures the spices are evenly distributed, preventing pockets of flavor that could make some bites overly spiced while leaving others bland. Take a moment to sniff the dry mixture; a fresh aromatic scent signals that the spices are still potent. If any lumps appear, break them with a fork or a small sieve. This dry foundation will later combine with the wet ingredients to create a batter that is smooth yet light enough to rise in the mini‑muffin tin.
Mix Wet Ingredients
In a separate bowl, combine the pumpkin puree, buttermilk, melted butter, and the egg. Whisk vigorously until the mixture is smooth and the egg is fully incorporated, creating a glossy, amber‑colored liquid. The acidity of the buttermilk will react with the baking powder later, giving the bites a tender crumb. If you notice the mixture looks too thick, add a splash of milk (dairy or plant‑based)—just a tablespoon at a time—until it reaches a pourable consistency similar to a thick pancake batter. This step is crucial because over‑mixing can develop gluten, leading to a denser bite.
Combine Wet and Dry Mixtures
Make a well in the center of the dry ingredients and pour the wet mixture into it. Using a rubber spatula, fold the two together gently, scraping the sides of the bowl as you go. The goal is to achieve a batter that is just combined; a few streaks of flour are acceptable. Over‑mixing at this stage can cause the gluten in the whole‑wheat flour to develop, resulting in a tougher texture. Watch for the batter to become smooth and slightly thick—if it appears too runny, sprinkle a tablespoon of additional flour and mix gently.
Preheat & Prepare the Mini‑Muffin Tin
Position a rack in the middle of your oven and preheat to 375°F (190°C). While the oven heats, lightly grease a 12‑cup mini‑muffin tin with a neutral oil or non‑stick spray. If you prefer a crispier edge, line each cup with a small paper liner; this also makes removal easier. The high heat will give the bites a golden‑brown top while keeping the interior moist. Avoid using butter for greasing as it can burn at this temperature, potentially imparting a bitter flavor.
Fill the Muffin Cups
Using a small ice‑cream scoop or a tablespoon, fill each prepared cup about three‑quarters full. The batter should spread slightly on its own; avoid over‑filling as the batter will rise and could overflow, creating a mess on the tin. If you wish to add texture, sprinkle a few toasted pumpkin seeds or a pinch of coarse sea salt on top of each bite before baking. This adds a delightful crunch that contrasts with the soft interior.
Bake to Golden Perfection
Place the tin in the preheated oven and bake for 12‑15 minutes, or until the tops are a deep golden brown and a toothpick inserted into the center of a bite comes out clean or with just a few moist crumbs. Around the 10‑minute mark, rotate the tin halfway to ensure even browning, especially if your oven has hot spots. The edges should be slightly crisp while the centers remain fluffy. Avoid opening the oven door too frequently; sudden temperature changes can cause the bites to collapse.
Cool Slightly & Remove
Allow the baked bites to rest in the tin for 3‑4 minutes; this lets the steam finish cooking the interior and makes them easier to release. Then, using a small offset spatula, gently lift each bite from the cup and transfer to a wire rack. If you notice any sticking, run a thin knife around the edge before removal. Cooling on a rack prevents condensation from making the bottoms soggy, preserving the crisp exterior.
Prepare the Maple Glaze
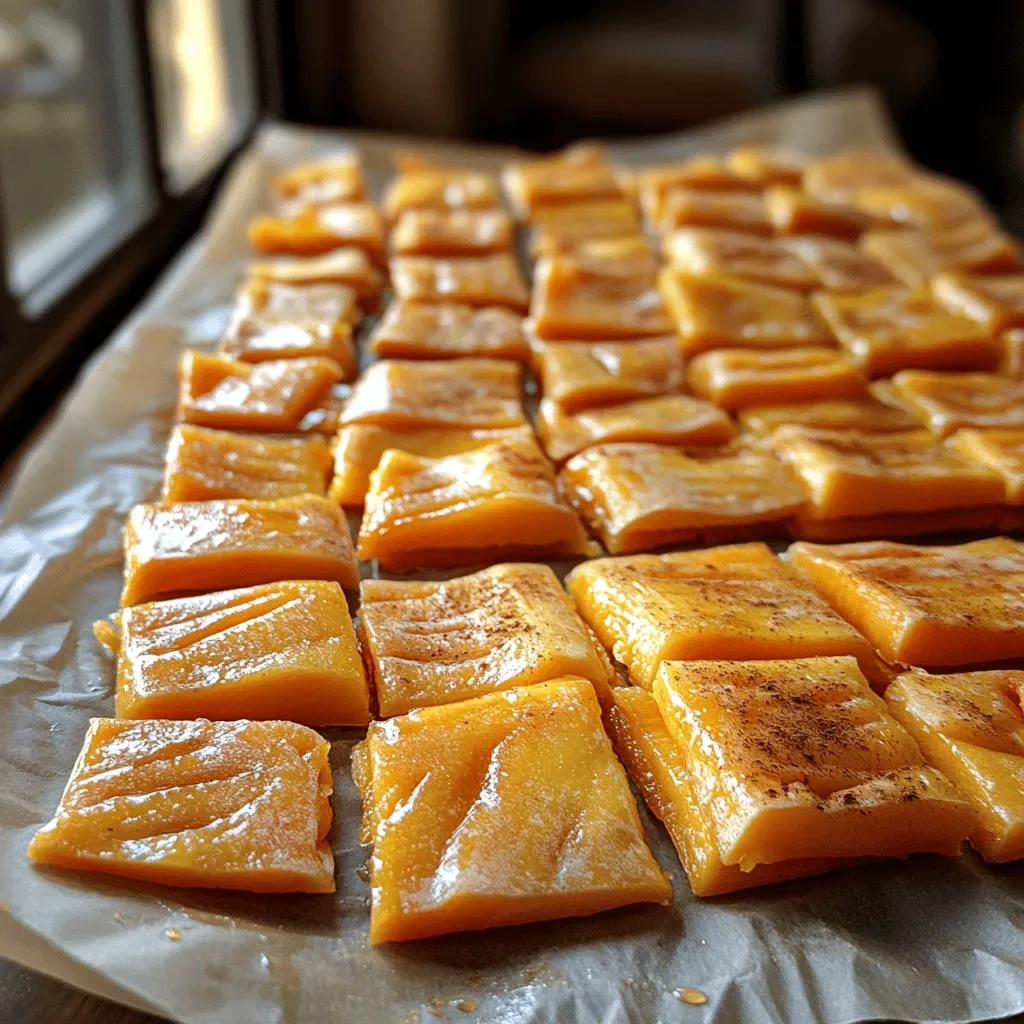
While the bites cool, combine the maple syrup, brown sugar, and a pinch of sea salt in a small saucepan over medium‑low heat. Stir continuously until the sugar dissolves and the mixture thickens slightly, about 3‑4 minutes. The glaze should coat the back of a spoon but still be pourable. Remove from heat and let it cool for a minute; this prevents it from running off the bites too quickly. Drizzle the glaze over each pancake bite in a decorative swirl, allowing it to pool slightly at the base for a professional presentation.
Serve Warm or Store
Serve the Pumpkin Pie Pancake Bites while still warm for the best texture—soft inside, slightly crisp outside, with a glossy maple finish. Pair them with a hot cup of coffee, chai, or a glass of chilled apple cider. If you need to store leftovers, allow them to cool completely before transferring to an airtight container. They keep well at room temperature for up to 4 hours, or refrigerate for up to 3 days. Reheat gently in a toaster oven or a skillet over low heat to restore their original warmth without drying them out.
Expert Tips
Tip #1: Use Fresh Spices
Spices lose potency after about a year. Toast whole spices lightly before grinding to revive their essential oils, then grind fresh. This small step amplifies the pumpkin‑pie flavor dramatically, turning a good bite into an unforgettable one.
Tip #2: Chill the Batter
After mixing, refrigerate the batter for 10‑15 minutes. The chilled batter spreads less, resulting in a taller, fluffier bite with a more pronounced interior crumb.
Tip #3: Don't Over‑Mix
Mix until just combined. Over‑mixing activates gluten, leading to dense bites. A few small flour pockets are fine; they will hydrate during the brief rest.
Tip #4: Add Crunch
A tablespoon of toasted pepitas or chopped pecans folded into the batter adds texture contrast and a nutty note that pairs beautifully with pumpkin.
Tip #5: Use a Mini‑Muffin Tin
The tin ensures uniform size and quick, even cooking. If you lack a mini‑muffin tin, a silicone mini‑cupcake mold works equally well and eliminates the need for greasing.
Tip #6: Finish with a Glaze
A thin maple‑brown sugar glaze adds shine and a final burst of sweetness. Drizzle in a circular motion for an elegant presentation that also locks in moisture.
Common Mistakes & How to Avoid Them
- Mistake 1 – Over‑mixing the batter:
- Mistake 2 – Using canned pumpkin with added sugars or spices: It masks the natural flavor and throws off the balance. Solution: Choose 100 % pure pumpkin puree and add your own spices.
- Mistake 3 – Over‑filling the muffin cups: Batter spills over, causing uneven tops and a mess. Solution: Fill each cup only three‑quarters full; the batter will rise nicely.
- Mistake 4 – Skipping the glaze: Without the glaze the bites can feel dry and lack visual appeal. Solution: Prepare a quick maple‑brown sugar glaze and drizzle while the bites are still warm.
- Mistake 5 – Storing while still warm: Traps steam, making the exterior soggy. Solution: Allow bites to cool completely on a wire rack before sealing in a container.
Variations & Creative Twists
- 1. Sweet Potato Swap: Replace pumpkin puree with an equal amount of roasted sweet‑potato puree for a slightly sweeter, orange‑rich bite. Adjust spices by adding a pinch more cinnamon.
- 2. Chocolate‑Streaked: Fold in 2 tbsp dark chocolate chips into the batter for pockets of molten chocolate that contrast the pumpkin’s earthiness.
- 3. Savory Herb Version: Omit the brown sugar and maple glaze, add fresh rosemary and thyme to the batter, and finish with a drizzle of herb‑infused olive oil. Perfect for brunch with a poached egg.
- 4. Gluten‑Free Adaptation: Use a 1‑to‑1 gluten‑free flour blend and ensure the baking powder is gluten‑free. The texture remains light, and the flavor stays true to the original.
- 5. Miniature “Pie” Presentation: After baking, top each bite with a dollop of spiced whipped cream and a tiny crumble of graham cracker for a bite‑size pumpkin pie experience.
Storage & Reheating
Once the bites have cooled, store them in an airtight container. At room temperature they stay fresh for up to 4 hours, ideal for a brunch spread. For longer storage, refrigerate for up to 3 days. If you need to freeze, arrange the bites on a parchment‑lined tray, freeze solid, then transfer to a zip‑top bag; they will keep for 1 month. To reheat, preheat a toaster oven to 350°F (175°C) and warm for 5‑7 minutes, or place them in a skillet over low heat, covered, adding a splash of water to create steam and restore softness.
Serving Suggestions
Pumpkin Pie Pancake Bites shine on their own, but pairing them thoughtfully elevates the experience. Serve alongside a steaming mug of spiced chai or a cold glass of apple‑cider‑sparkler for contrast. Add a small side of Greek yogurt sweetened with a drizzle of honey and a sprinkle of toasted pumpkin seeds for a protein boost. For a brunch buffet, arrange the bites on a platter with fresh berries, sliced banana, and a small bowl of vanilla‑infused whipped cream. They also pair beautifully with a crisp, buttery croissant or a slice of toasted sourdough brushed with melted butter.
Nutrition
Per serving (1 bite, approx. 30 g)